Template Designer User Guide
Template Design | User Guide
Choose your paper size, with the option to select A3, A4, A5, letter, or set a custom size. Set up page orientation to Landscape or Portrait.
Select the number of labels per page – For an easy setup of a 1up, 2up, 4up, 8up, 9up & 16up.
Set up your page margins and gaps between templates to fit your paper stock & printing requirements. Choose the layout of the tickets, with the option to arrange the template across or down.
Add a background image to your template, this will support the correct alignment of other fields.
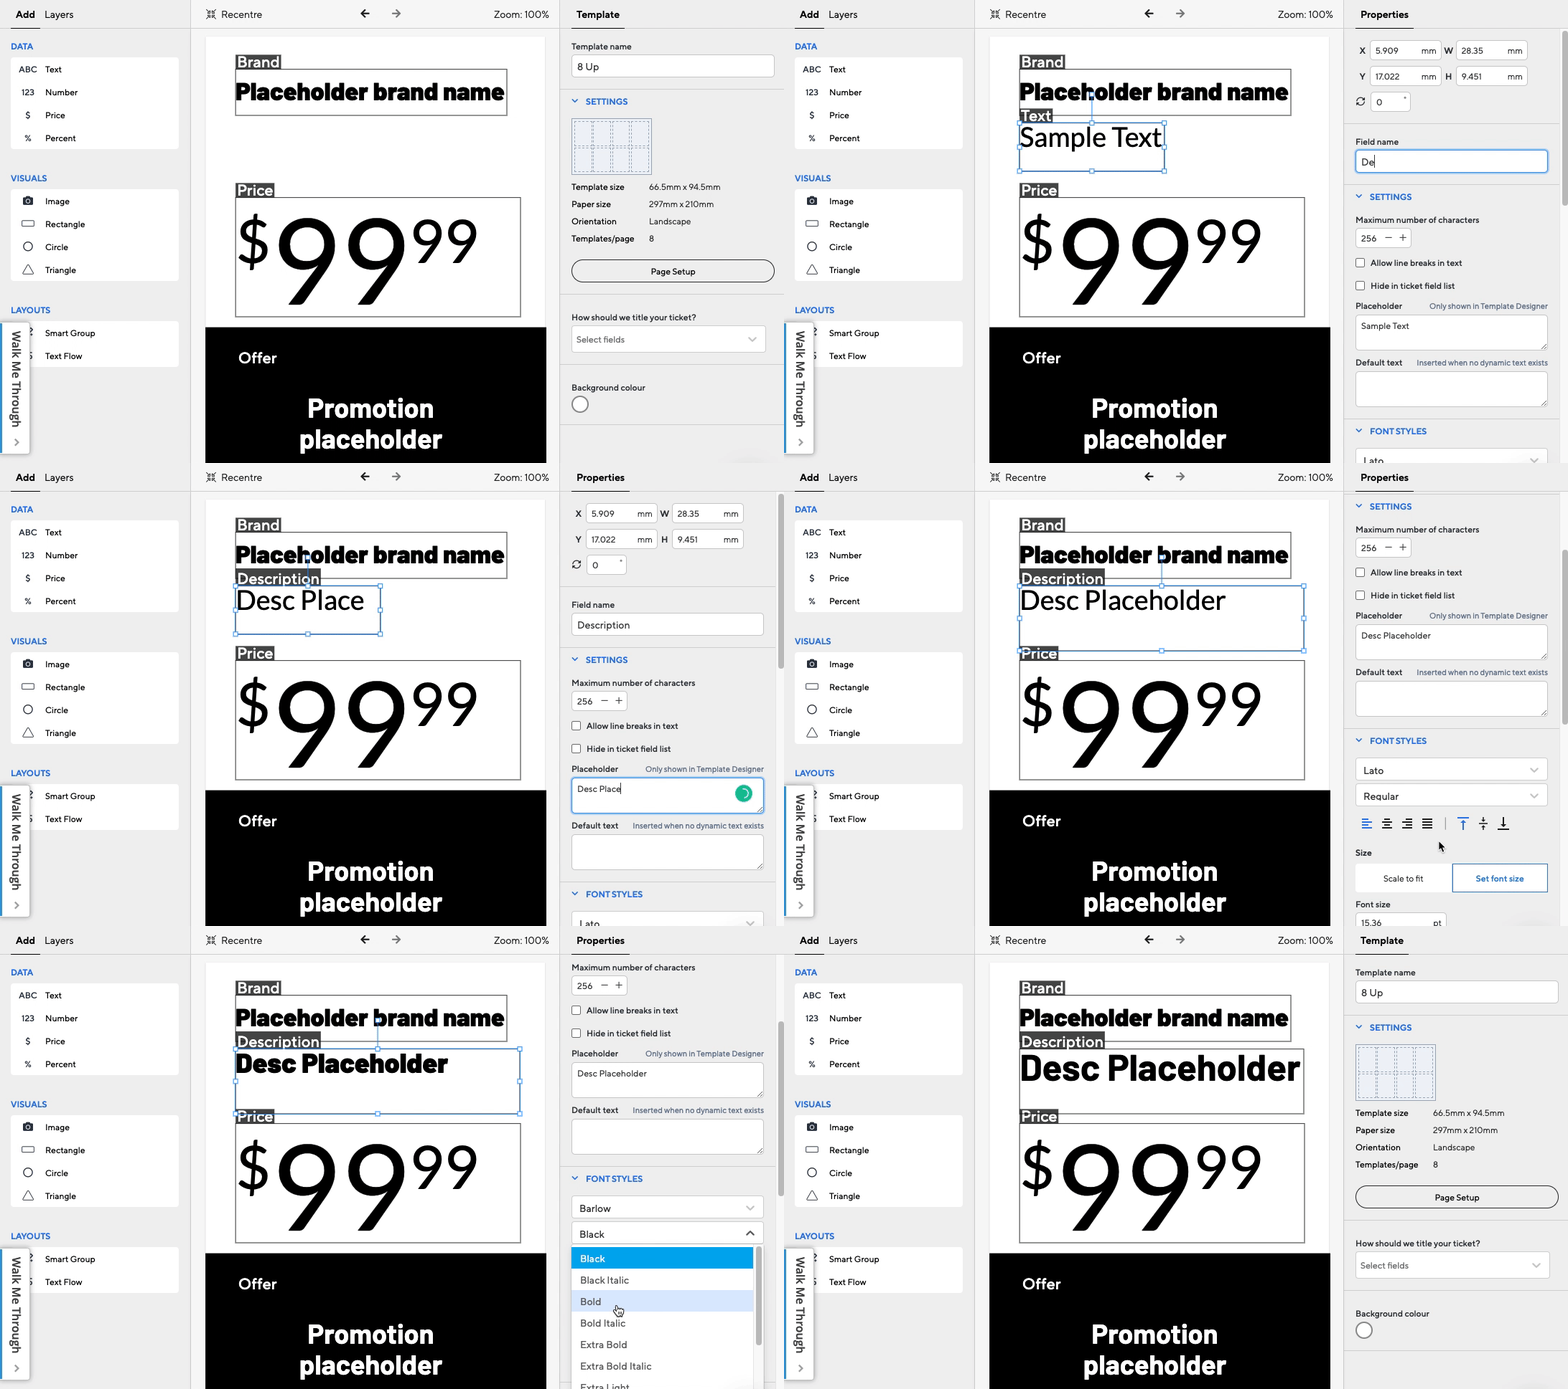
Add your text fields. Select your font style, size, and alignment.
The placeholder text will enable you to connect the field with your data. For example, brand could be the placeholder value to connect to the brand name within your data.

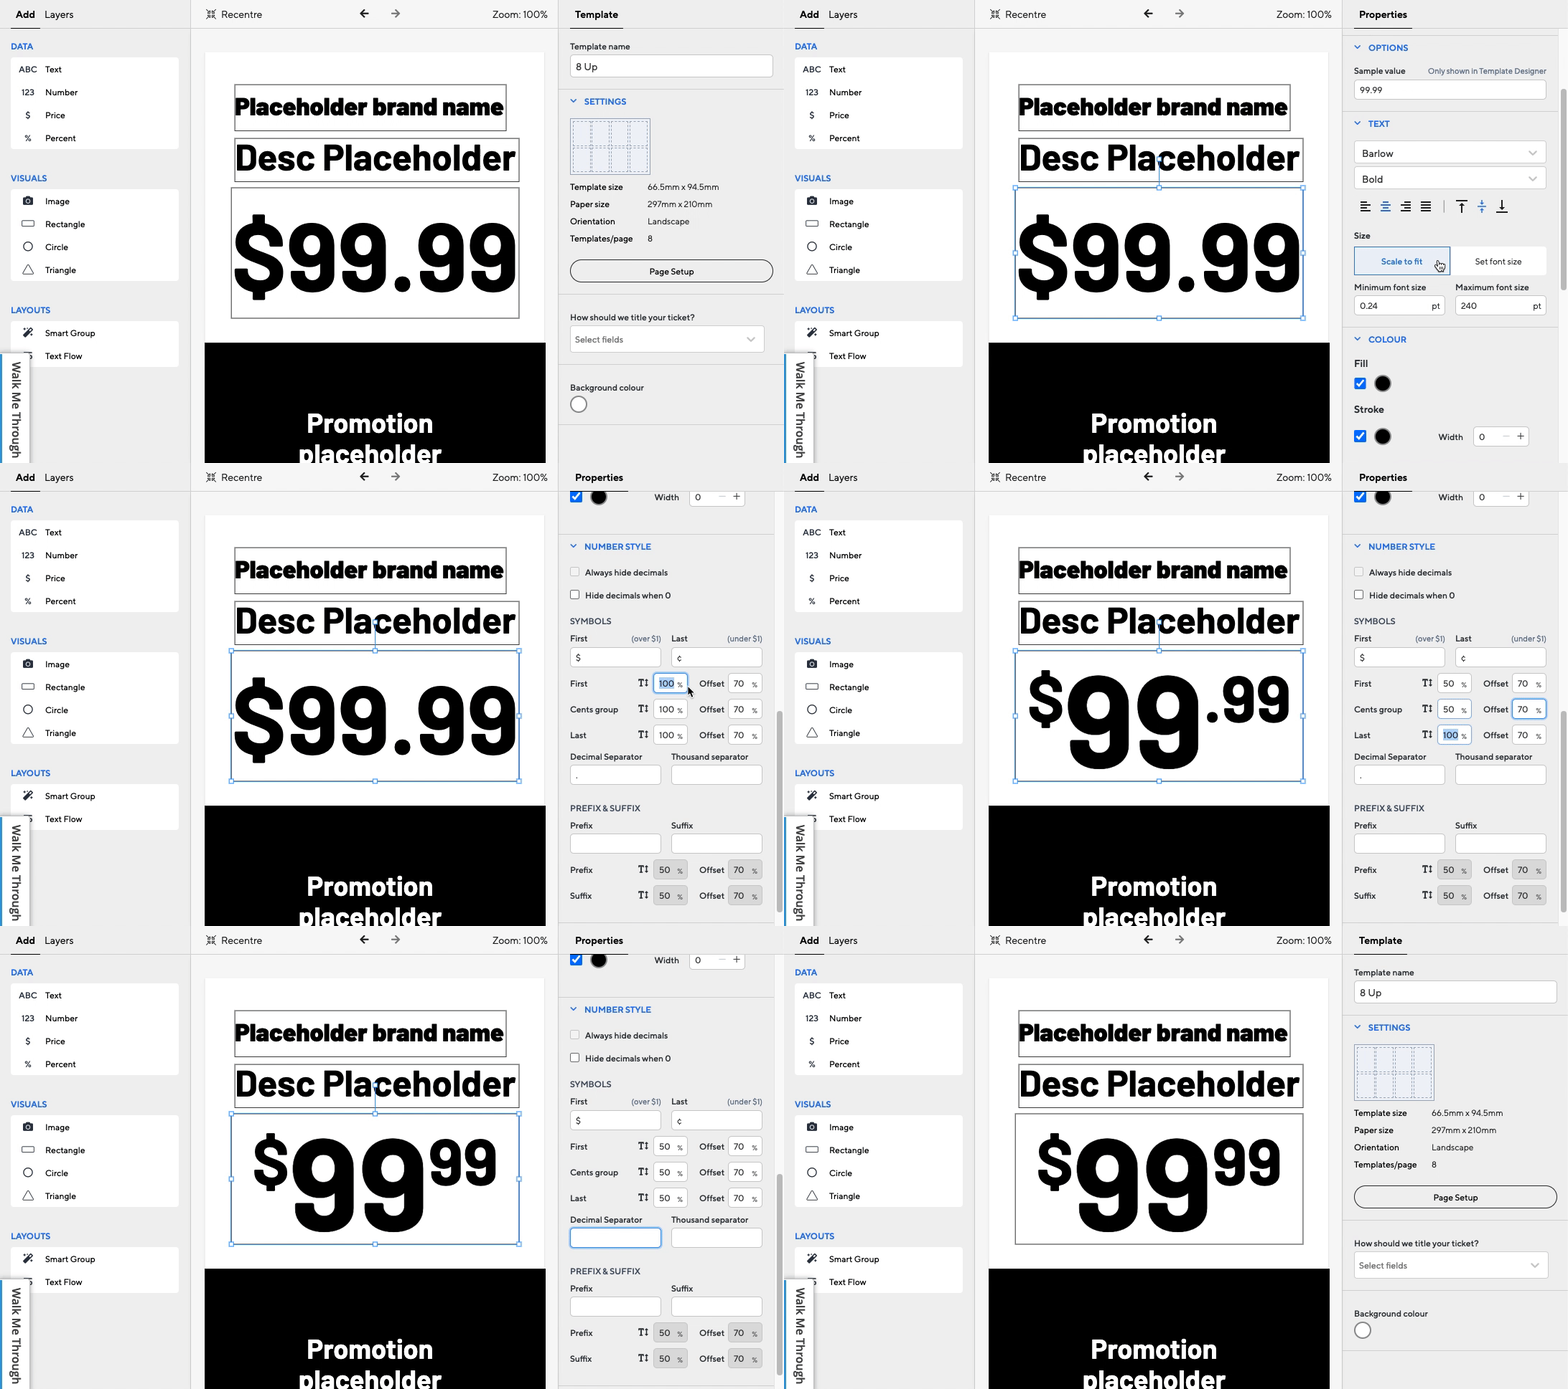
Add a price field – assign the sample value text to match your data. The number style section provides retail-specific price display alterations to choose from.

Use the text flow group to collate your data fields. The text flow feature will ensure that text is formatted correctly when grouped together.
The flexibility of Smart Groups allows you to create simple layouts that resize to fill the space of any missing values, all the way up to complex layouts such as tables, spec sheets, and more.
Once you have completed the template design you can then assign the design to stores.
Create a new ticket batch and assign the designed template.
Stores can simply print tickets within the ticket batch or directly from the dashboard.